Introduction to Metadata
Metadata is what search engines and social platforms use to understand and display your content when a link is shared.
While Pagewheel automatically creates strong metadata for your product, you can customize it to better fit your preferences.

Accessing Metadata Configuration
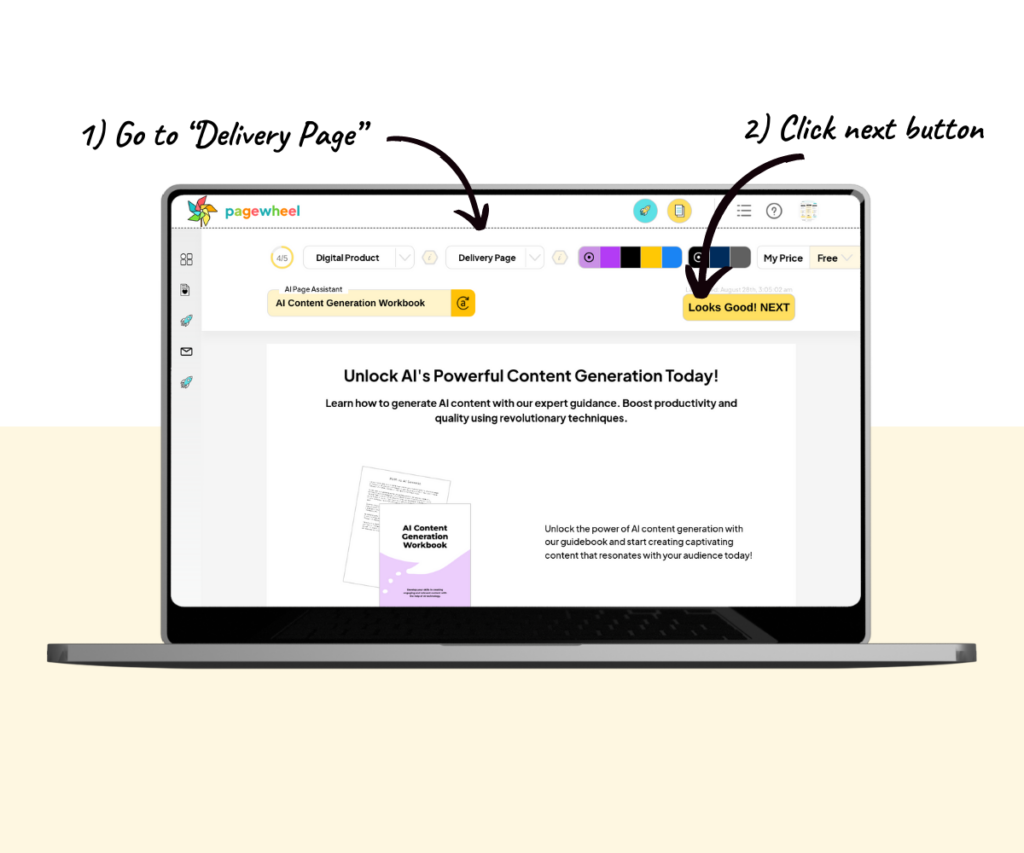
To edit a product’s metadata, go to stage four of the product builder workflow.
After clicking the next button on the delivery page, you’ll see the metadata box appear.
You can also edit the website for an existing product. Simply locate the product listing and click the website button.
For more information, see Creating the Website for Your Product.
Configuring Metadata
The metadata box will display after clicking the next button. Here is a video walk through of the basics available to customize this step of your Pagewheel funnel build:
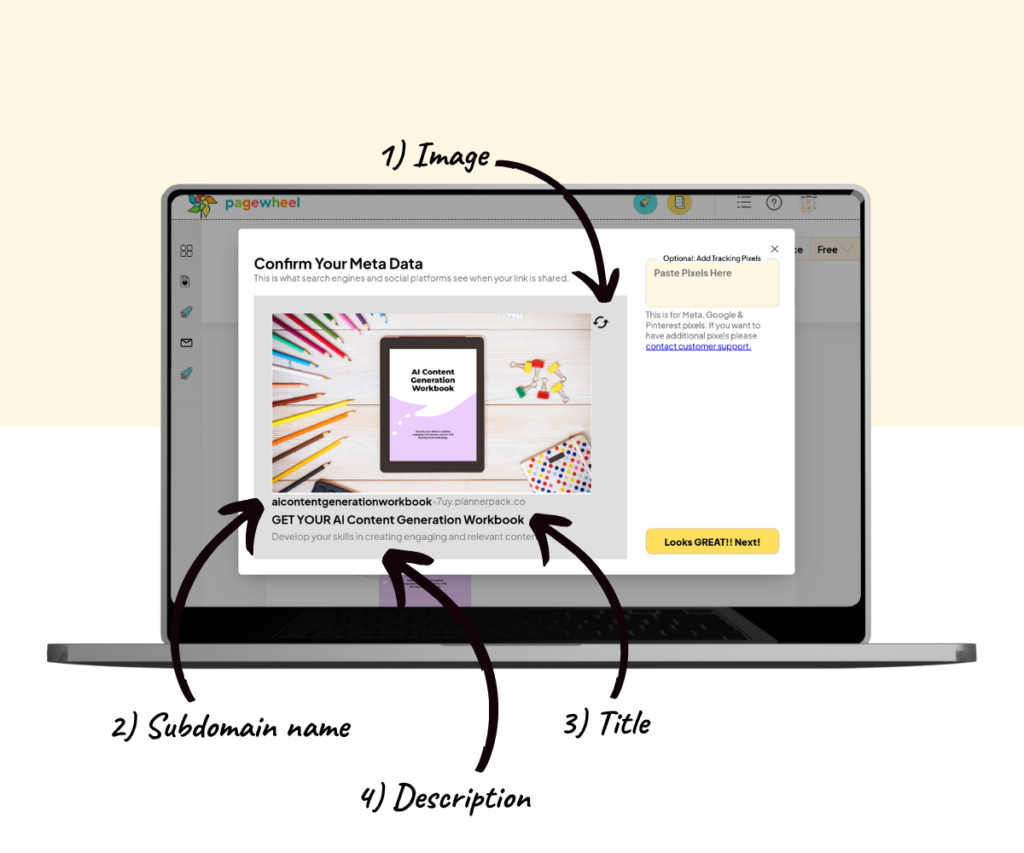
Here, you can fully customize what is displayed when your product is shared.

There are several options you can customize (Pagewheel has been updated since the images in this section were taken so there are a few new options added here):
- Tab: Click the text to customize what you want shown on the browser tab when visitors are on your funnel.
- Image: Click to refresh the image. Select one that best represents your product’s. This is based on your product’s cover design or uploaded hero image. If you would prefer to upload your own image for this preview, then click on that option on the right upper side of the image section.
- Subdomain Name: Change the subdomain name for the website that hosts the offer and delivery pages. I like to make it a little shorter for ease of sharing. Please note that there will be a few characters within the url that you cannot edit.
- Title: Use this for an attention grabbing headline.
- Description: Provide a brief overview of your product.
When you’re done, click the next button to save your changes.
Caution: Changing the Subdomain Name
This lets you change the subdomain name for the website that hosts the offer and delivery pages.
Pagewheel automatically generates a subdomain name based on your product’s title, which works well for most users.
If you decide to change it, make sure the text is lowercase and doesn’t include spaces or special characters.
Warning: Changing the subdomain name will cause any existing links you’ve shared to stop working.
For more information, see How to Change Your Product’s Subdomain.
Adding Tracking Pixels
Insert your tracking pixel or tag into the box on the right.
Click the next button to save your changes.
Please note that only Meta Pixel, Google Analytics, and Pinterest are currently supported.
For any other tracking pixel types, reach out to support for help.
For more information, see How to Add a Tracking Pixel to Your Product.
First Promoter Affiliate Portal ID
Pagewheel now has the ability to support YOUR affiliates through First Promoter. If you have set up an affiliate program, then add your First Promoter ID in the yellow box for affiliate tracking.
This is OPTIONAL and only for those who have set up and run their own affiliate network independent of Pagewheel.
Add a Favicon
The newest feature in this step is the ability to add your own favicon which customizes your browser tab even more. Add your image to the box provided.
Getting the Shareable Links to Your Product
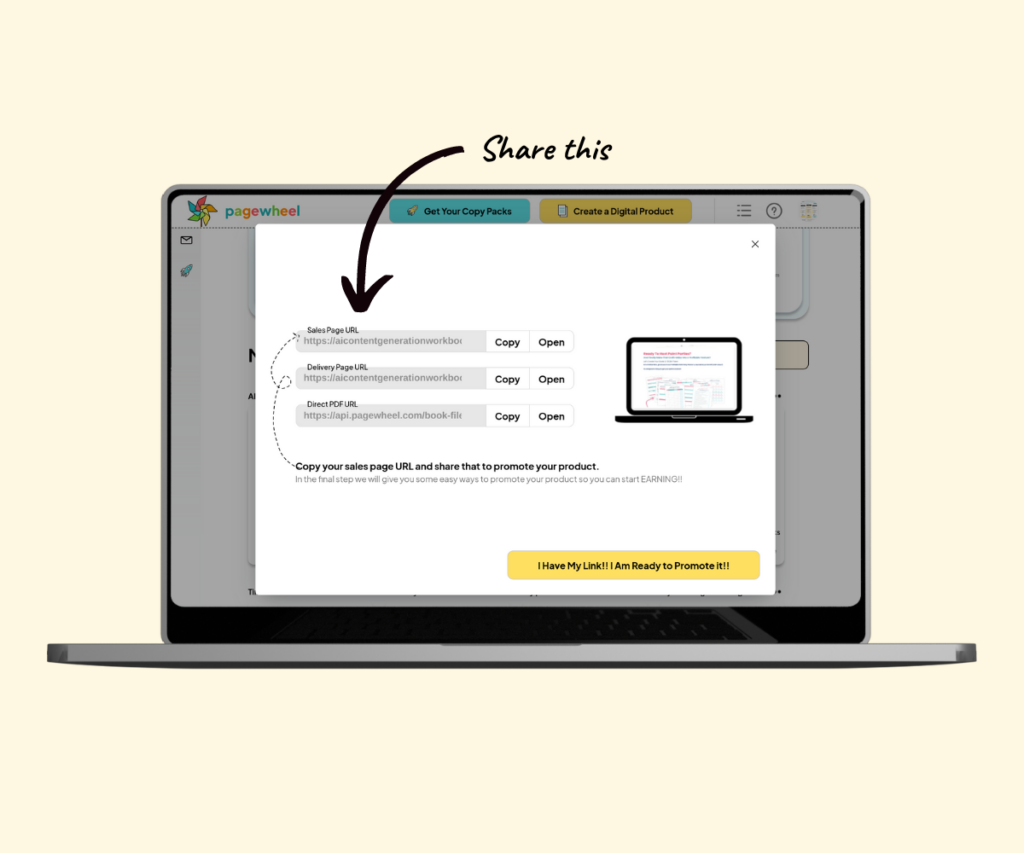
To share your product on social media or with others, you’ll need the Sales Page link.
You’re shown these links after publishing your product.
Alternatively, locate your product in the product library, then click “Your Links” under the product listing.
This will open a box with all the links to your product.
Click the button to copy the Sales Page URL.
For more information, see How to Find the Links to a Product.
Publishing Your Changes
Your updated metadata won’t be visible to users until you publish your website. If you’ve already published and made changes, you’ll need to publish again.
Proceed through the product builder until you reach the final step. Then, click the publish button to make your changes live.
For more information, see Saving vs Publishing.