How to Create a Product with the Page-by-Page Builder in Pagewheel
You can easily create an engaging product with the Page-by-Page builder in Pagewheel.
Accessing the Product Builder
You can open the Product Builder from the dashboard.
Simply click “Create a Digital Product” in the top bar.
Alternatively, click “Take me to the Product Builder” in the bottom left of the dashboard.
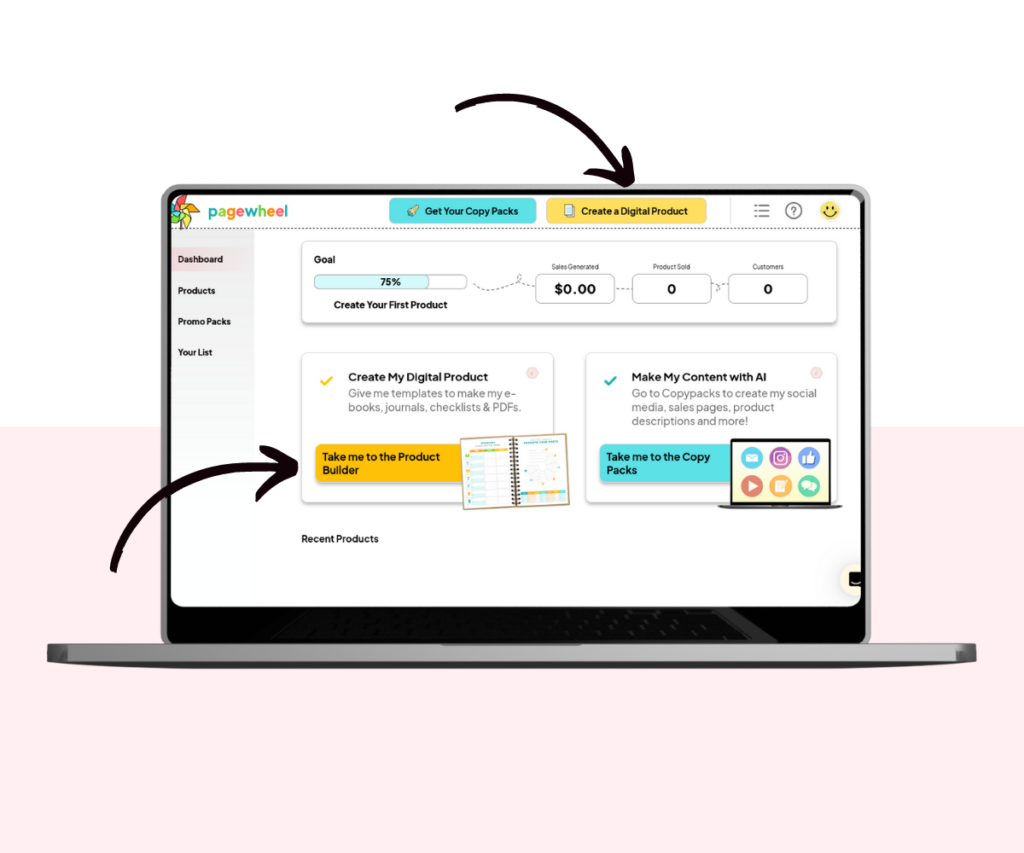
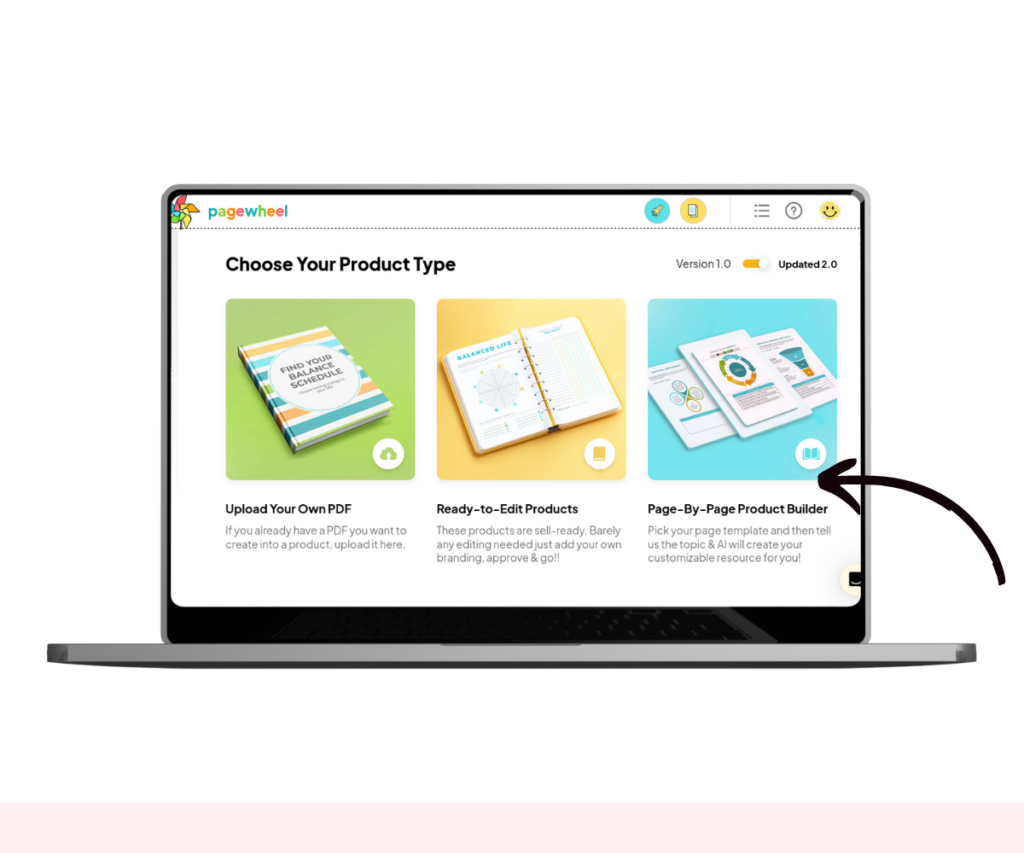
This will open the product type choice screen.
There are three options for building your product.
Choose the third option, “Page-By-Page Product Builder”, to open the product builder.
The Page-by-Page Builder
Pagewheel’s Page-by-Page Product Builder helps you quickly create engaging digital products.
Let’s go through each screen, one by one:
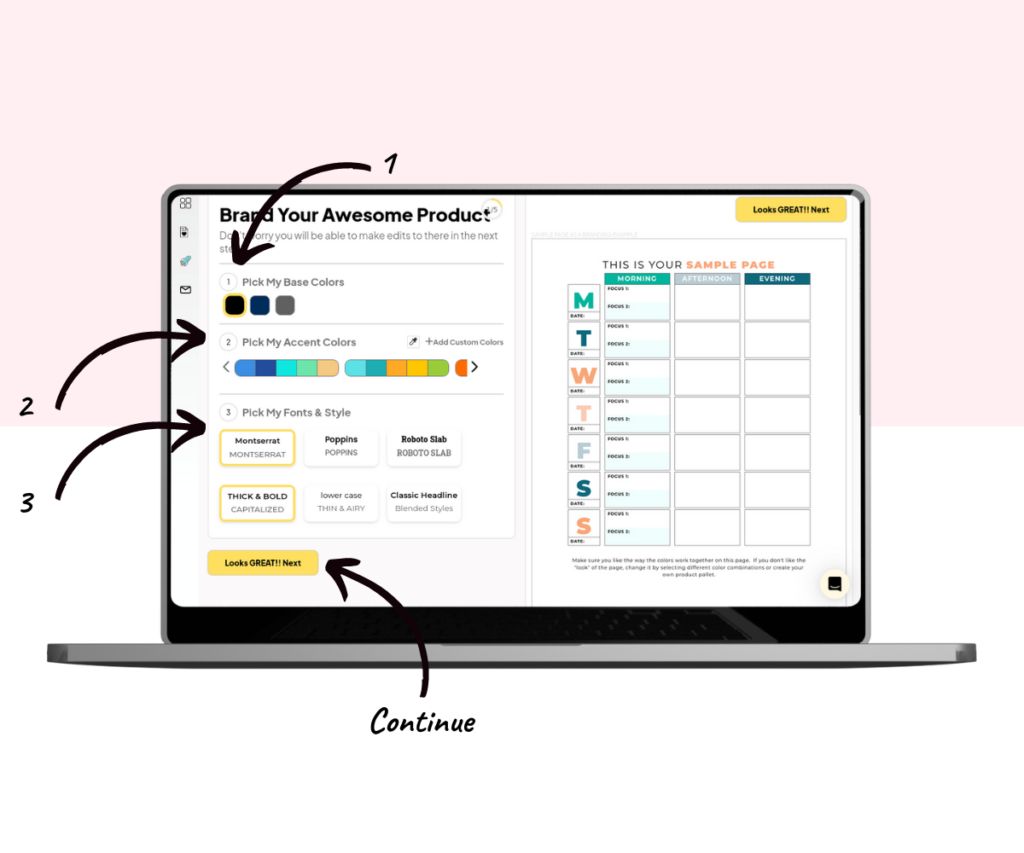
1st Screen: Branding
The first screen is for branding your product:
- Choose Your Base Text Color: This will be the primary color used for the majority of the text
- Select Your Accent Colors: These are sets of five colors. Choose the set that best represents your brand, or create your own custom accent color set
- Pick Your Fonts and Style: Select the fonts and styles that best match your brand
As you make your choices, they’re applied to the sample page on the right, letting you see the outcome. Note that this is just a sample page – it won’t be included in your final product.
When you’ve finished making selections, click the next button to continue.
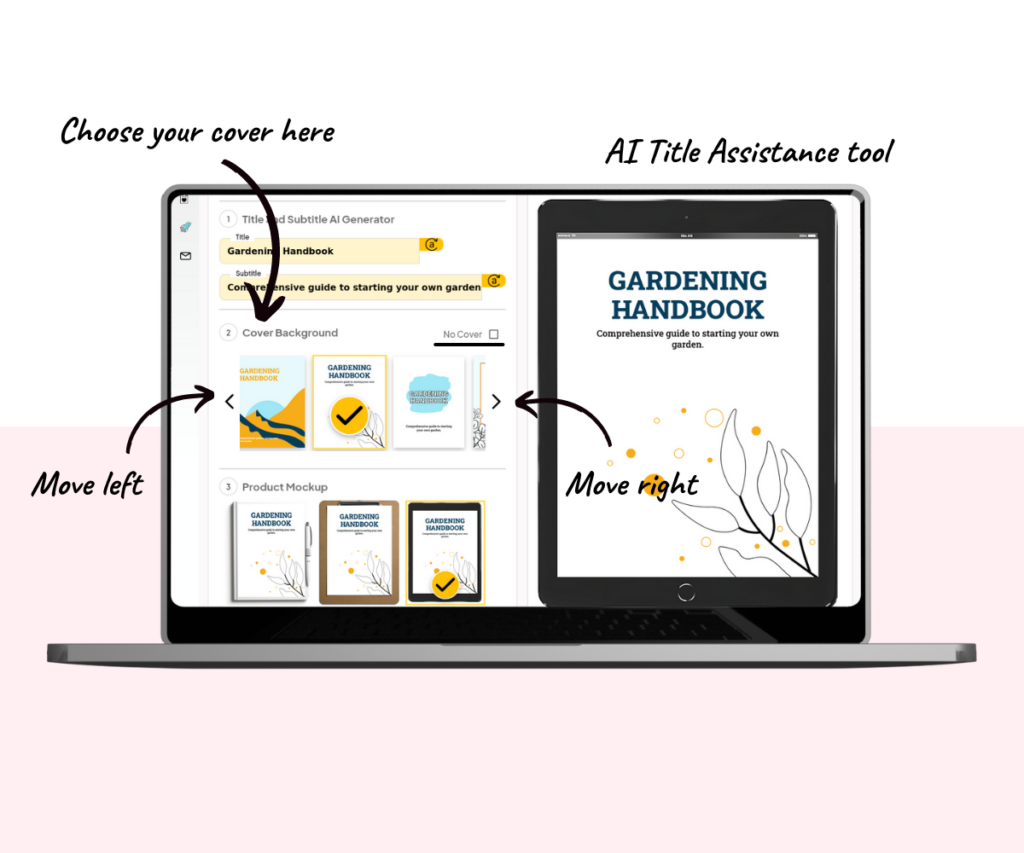
2nd Screen: Title, Cover, & Mockup
The second product builder screen is for making your product unique.
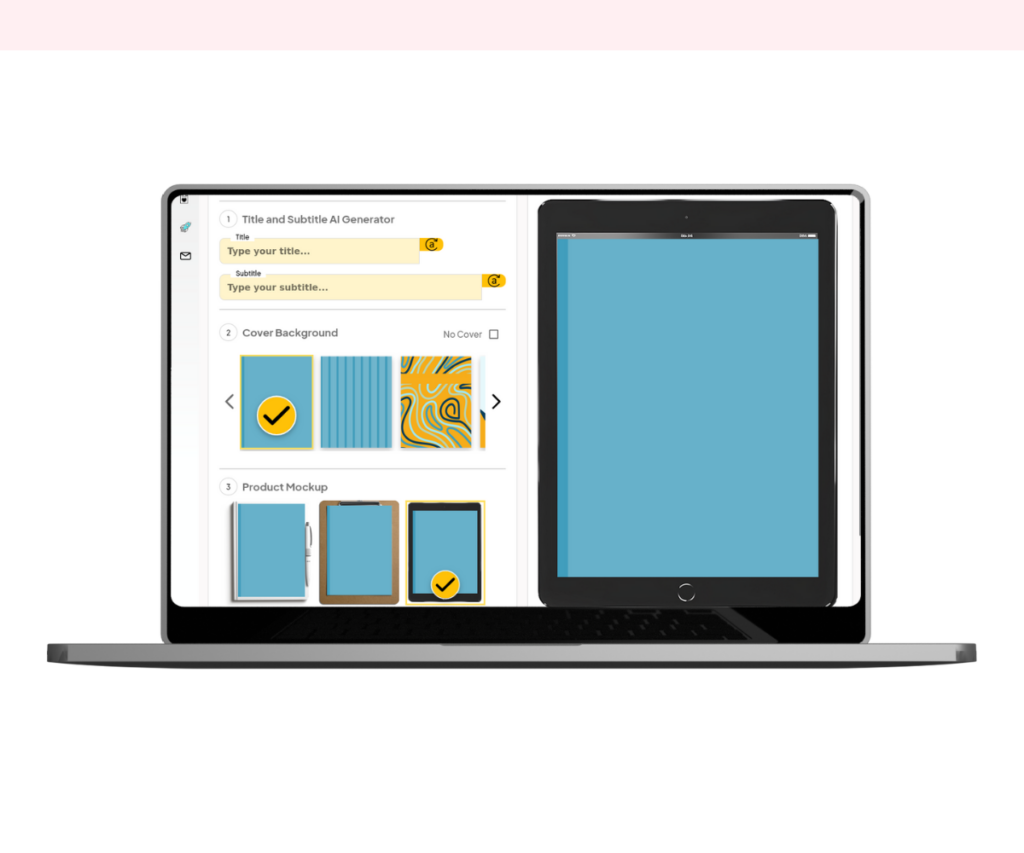
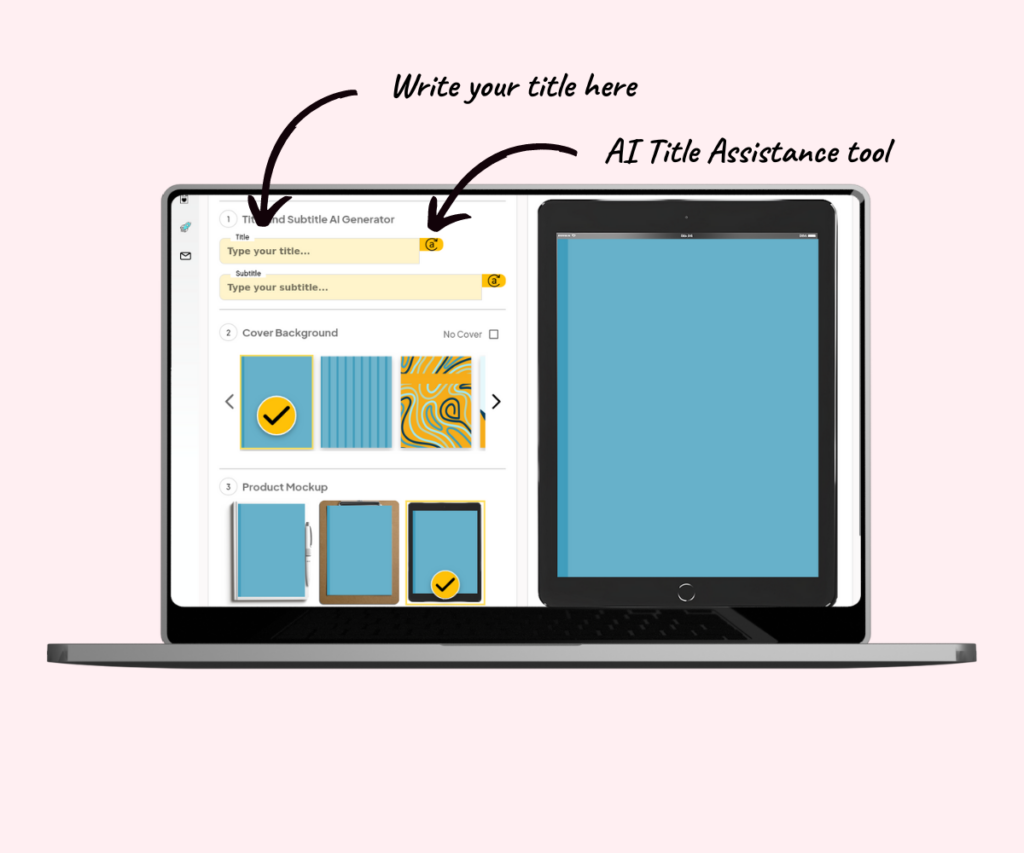
First, input the title and subtitle of your product.
If you’re having trouble coming up with a title, you can use the AI to create a title for your.
Click the AI assistance button next to the title box, describe your topic, and quickly receive title suggestions.
For more guidance, see How to Use AI to Create Product Titles.
Next, choose the cover background for your product.
You can choose to have no cover or select a ready made one:
- No Cover: Click the “No Cover” checkbox
- Select a Cover: Browse through the ready-made covers using the left and right arrows. Select a cover that suits the theme of your product
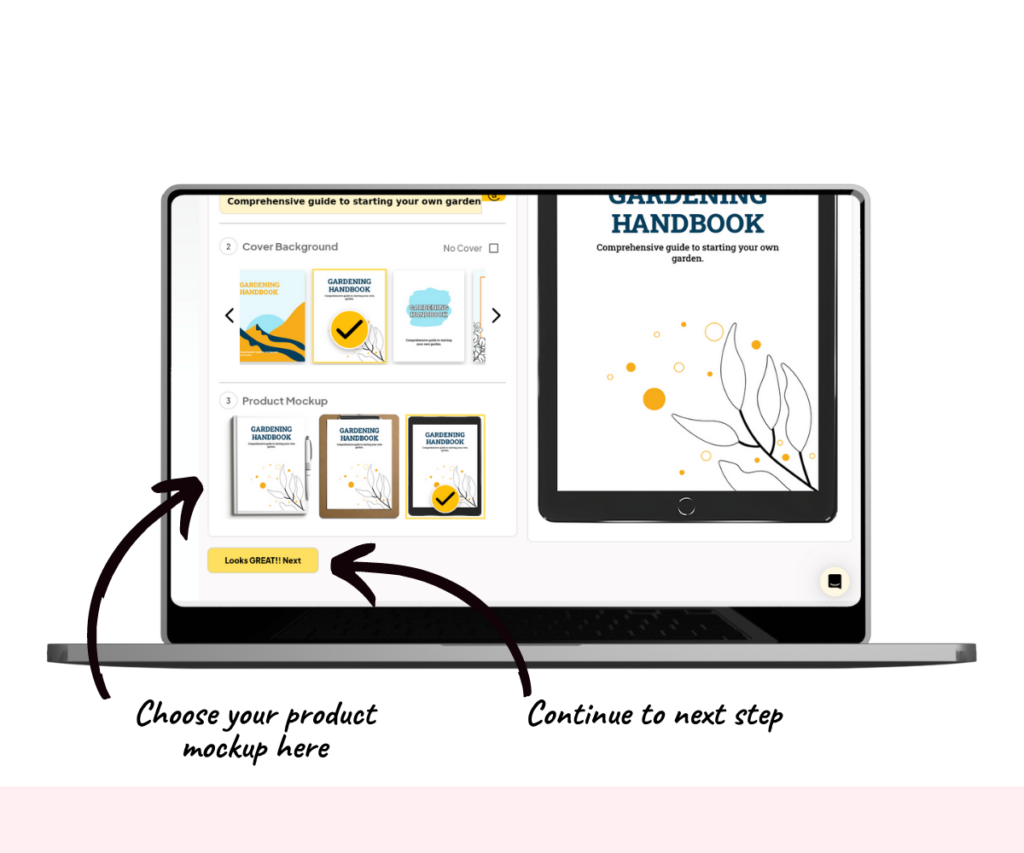
Finally, you need to select a product mockup. This will appear on your offer page.
Options include a book, a clipboard, or a tablet.
After selecting your mockup, click the next button to continue to the next screen.
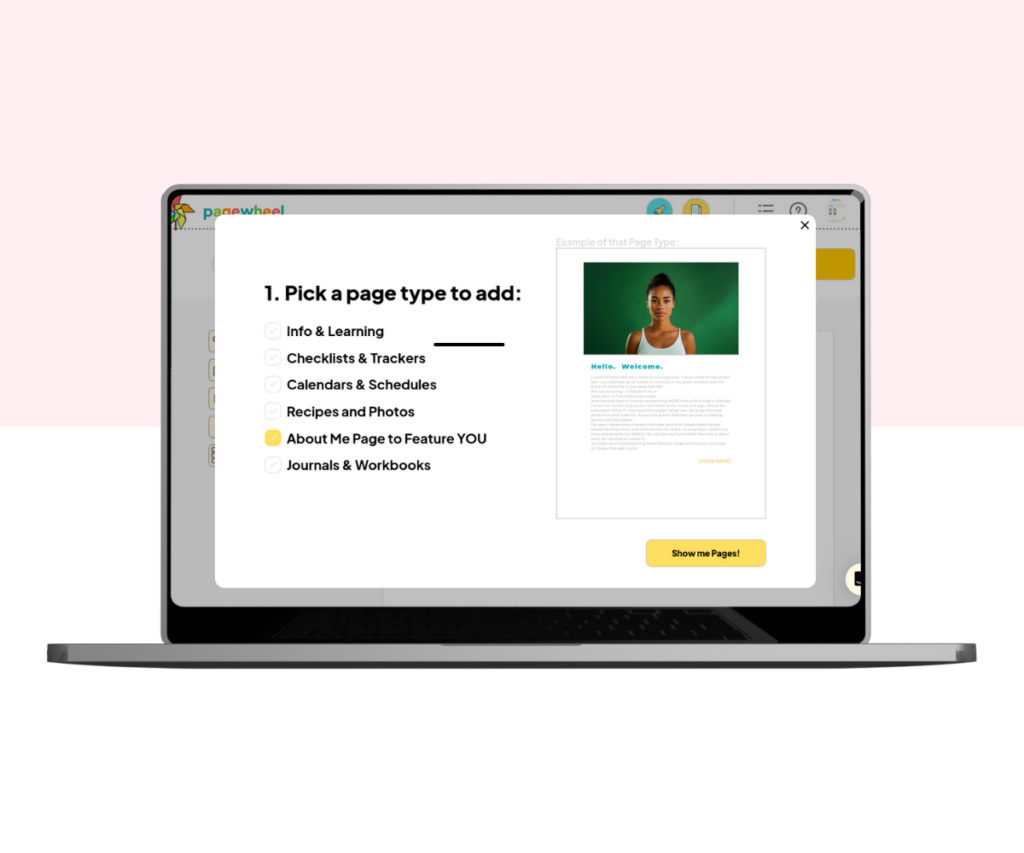
Pick Page Type Screens
The next screens allow you to select custom page types to include in your product.
As it’s always a good idea to include an about me page. Continue by selecting “About Me Page to Feature YOU”, then press the “Show me Pages!” button.
Select your preferred layout on the next screen, then press the add page button to continue.
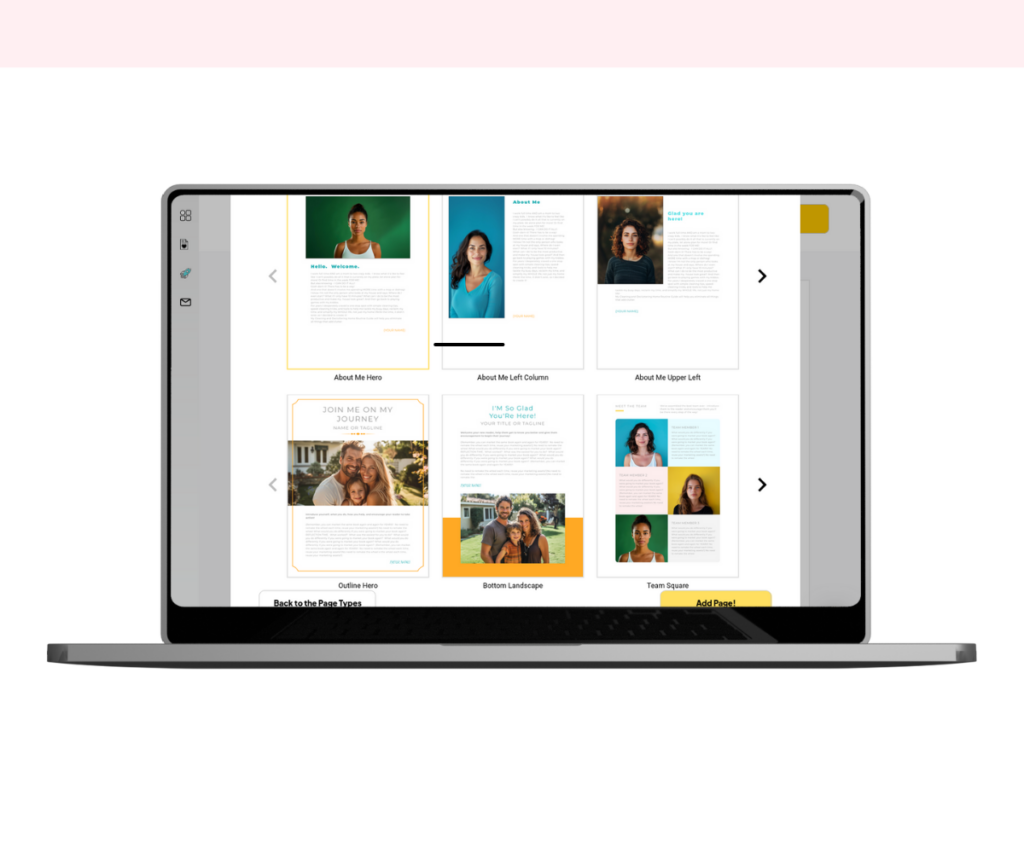
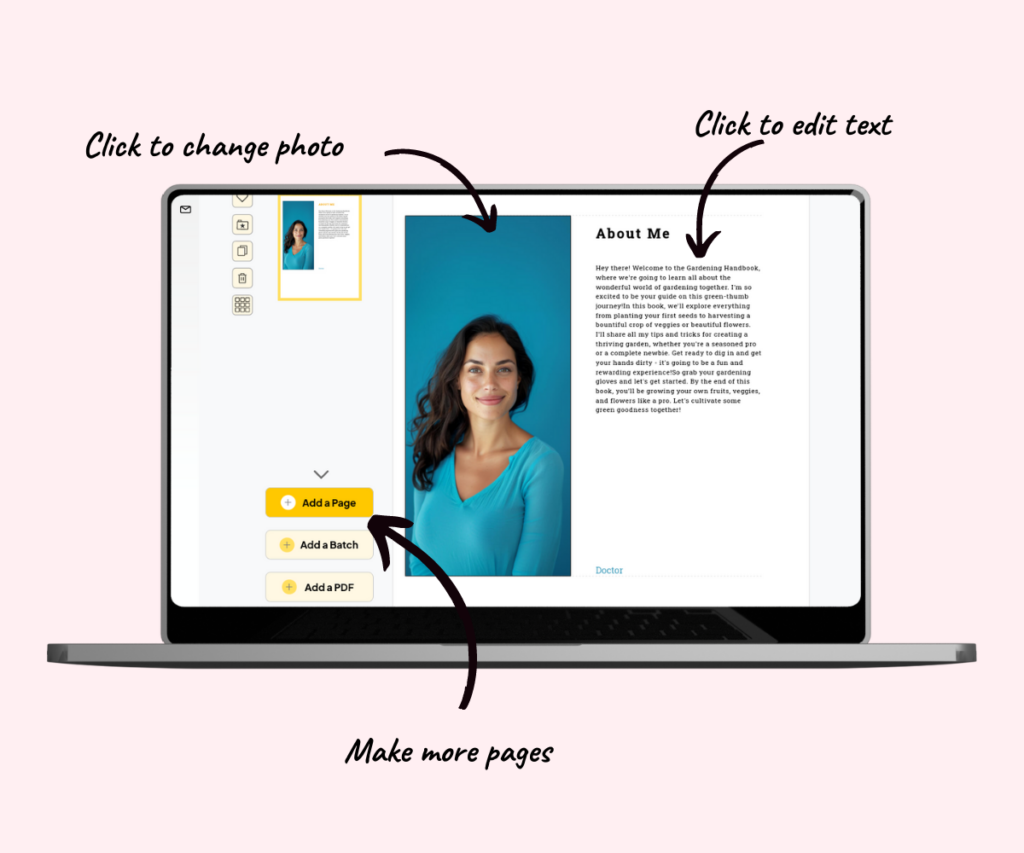
The selected page will open in the editor.
Here, you can add your own photo, edit the text, and customize it as you like.
If you want to add another page, simply click “Add a Page”.
Pages can also be deleted, and rearranged. You can even upload your own PDF pages.
Pagewheel also lets you quickly add a collection of pre-made pages to your product, which can be automatically tailored to your niche.
Click the “Add a Batch” button to access this useful feature.
For more information, see How to Add a Batch of Pages in the Product Builder.
Once you’ve finished adding custom pages, click the next button to continue.
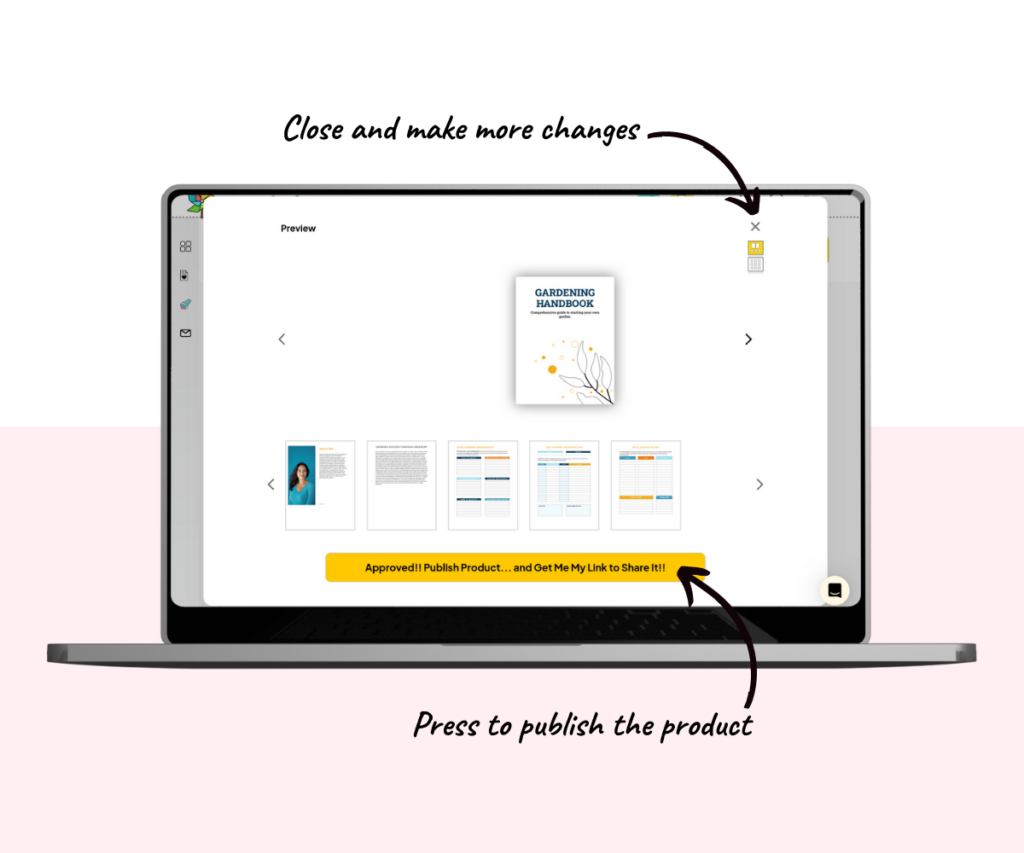
Preview Screen
The final preview screen will then be displayed. Use this to make any last checks.
If you need to go back and make changes, click the ‘X’ button in the top right at any time.
To publish your digital product, press the large yellow ‘Approved!’ button at the bottom.
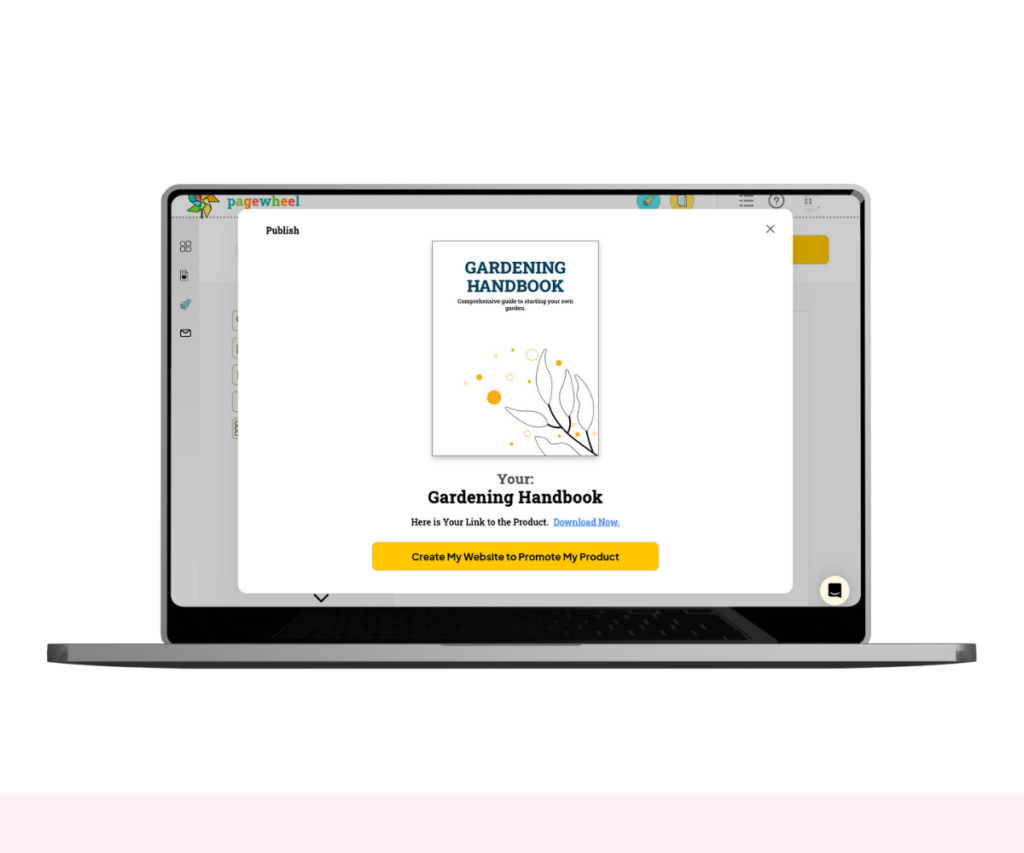
After publishing, you can download the product on the next screen.
You can then automatically create a website to promote your product.
To get the shareable links to your product, see the Guide to Getting Your Digital Product Link.