Linking to Your Product’s Community on the Delivery Page
After a customer purchases your product, they will see the Delivery Page.
This page includes a “Community Section,” which lets you link directly to your product’s community. No community? No problem! There are LOTS of ways to leverage this section!
Accessing the Delivery Page
You can edit the Delivery Page in the Website Editor, which is stage four of the product creation process.
To access the Delivery Page, use the page type dropdown menu.
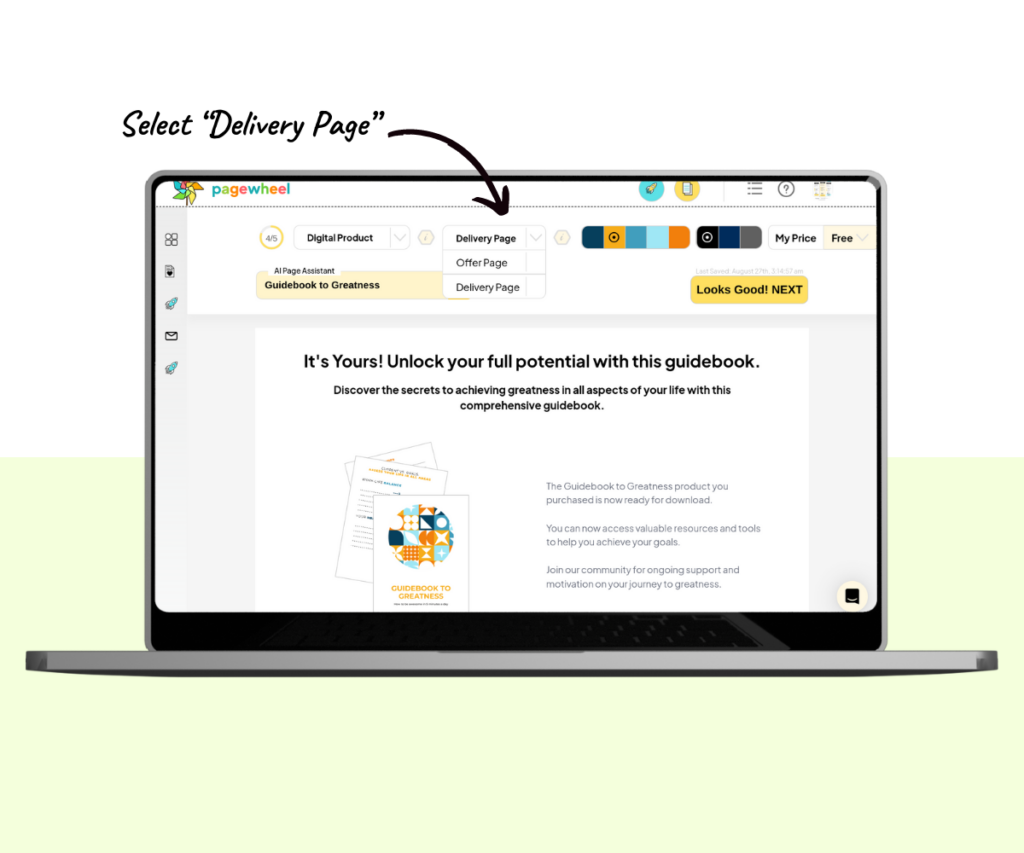
You can also edit the website of an existing product by finding the product listing and clicking the website button.
For more details, see Building the Website for Your Product.
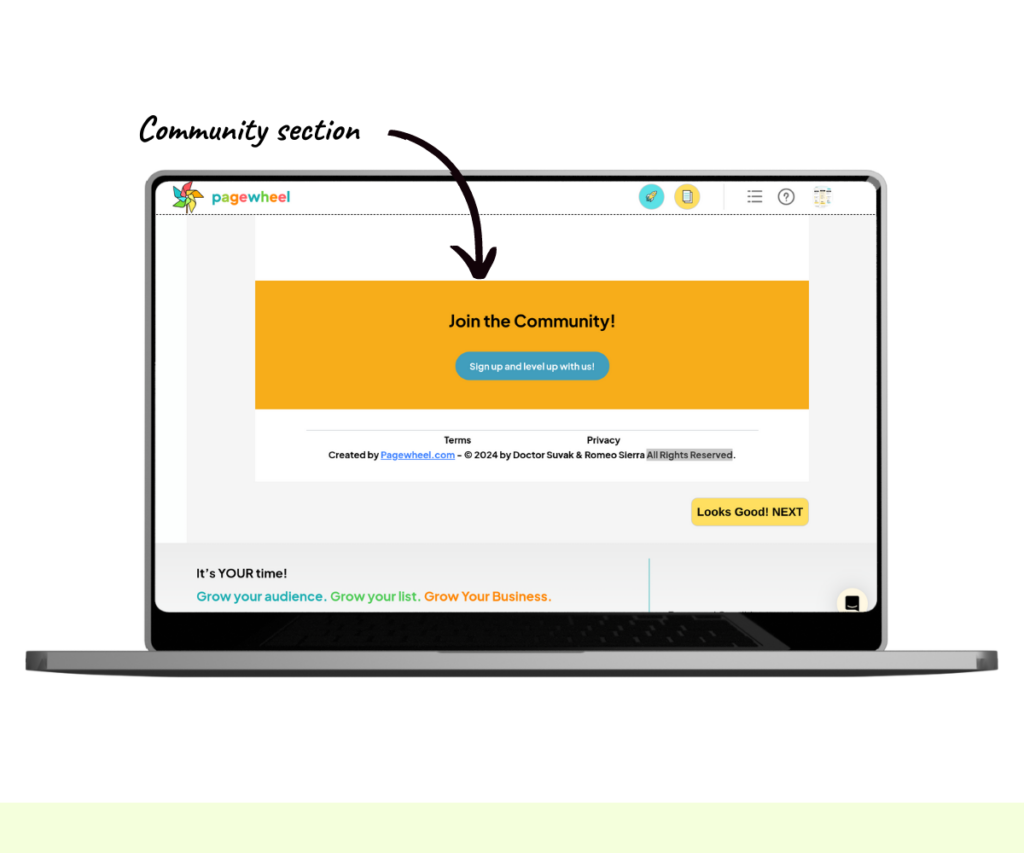
The Community Section
The Delivery Page comes with a default layout that is marketing-optimized for the target audience.
Scroll down to find the community section.
Here, you’ll find a large button that lets customers sign up for your community.
Linking to Your Product Community
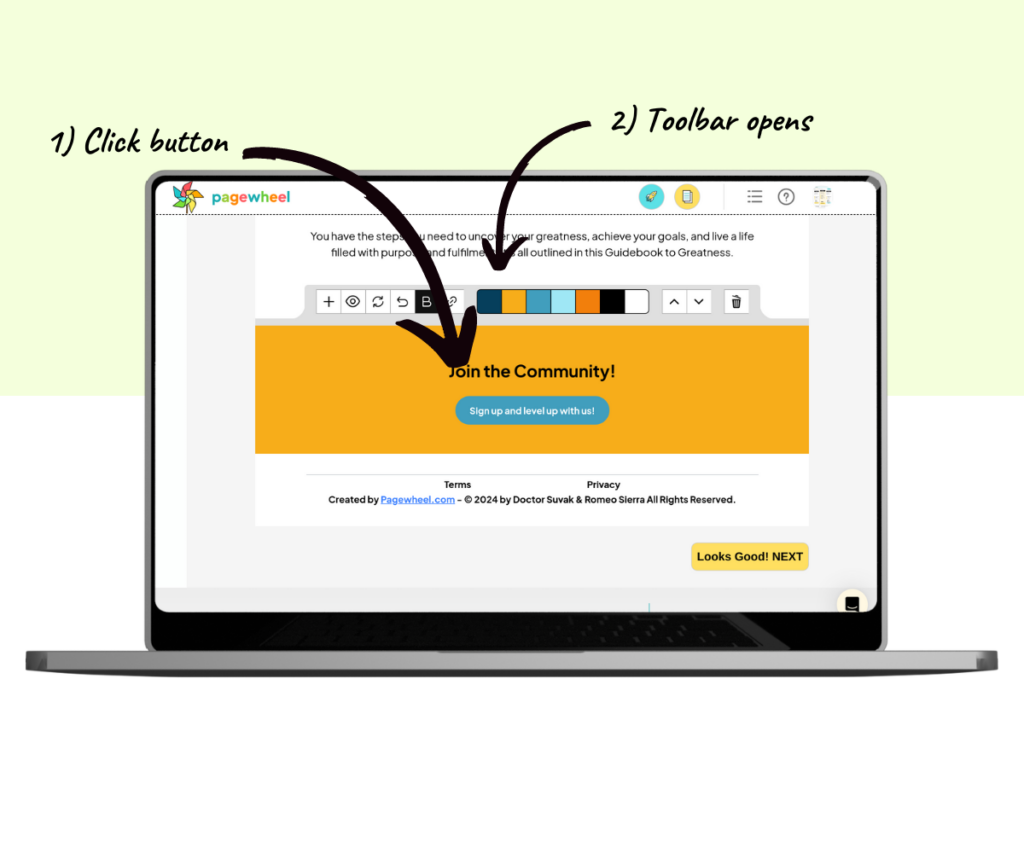
To link your product community to the button, start by selecting the button.
This will open the section editor toolbar.
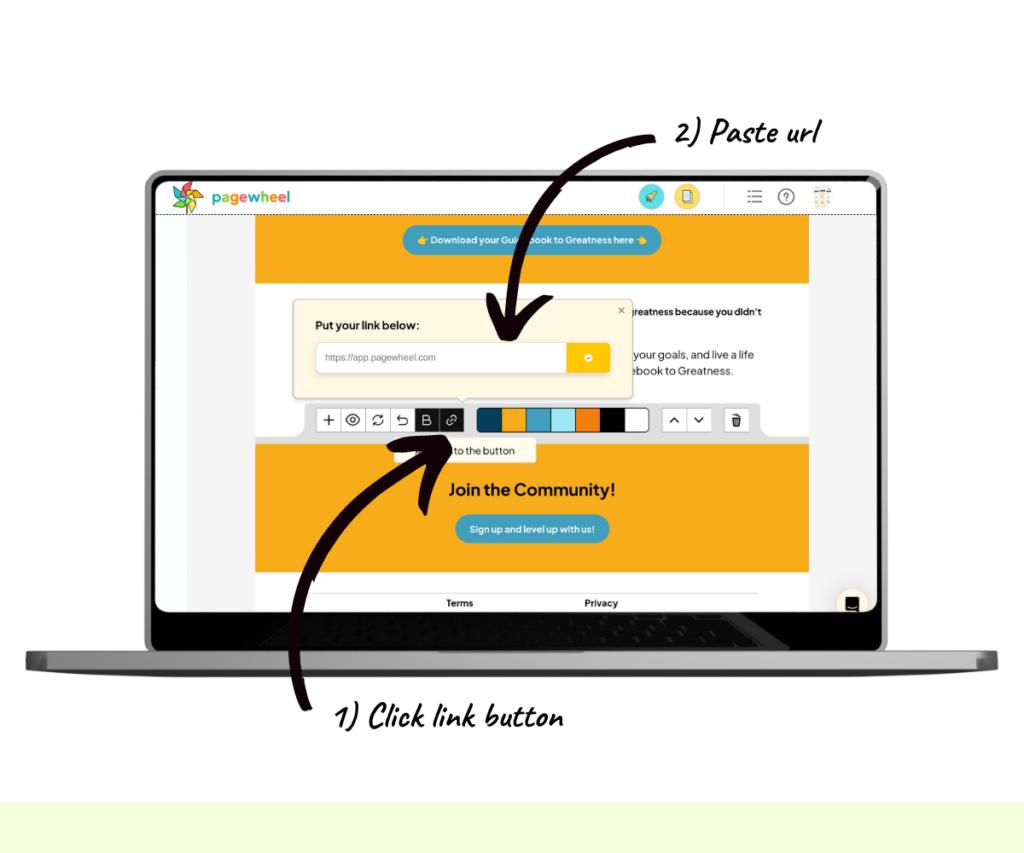
To add the link, press the link button.
When you hover over it, you should see “Add link to the button.”
A yellow box will appear.
Paste your link into this box, then press the button to confirm.
To learn more, see How to Use the Section Editor.
Creating a Product Community
If you haven’t yet created a product community, there are plenty of options available.
Here are some of the easiest and most effective choices:
- Create a Facebook Group: Build a community, encourage discussions, and create loyal fans who are interested in your product.
- Create an Instagram Page: Share eye-catching photos, reach younger people, and use hashtags to help more people find your product.
- Create a Pinterest Board: Great for sharing visual ideas, driving traffic to your site, and reaching women interested in lifestyle products.
For more guidance, see How to Create a Social Media Content Plan.
Alternative Uses of the Community Section
The community section can serve other purposes:
- Deliver a Lead Magnet: Use this section to offer a valuable resource to your audience.
- Related Product: Link to the sales page of another related product.
For more information, see How to Increase Revenue.
Hiding or Deleting the Community Section
If you haven’t created a product community yet, or don’t plan to, you can either hide or delete the section.
Hiding the Section
If you might create a product community later, it’s better to hide the section instead of deleting it.
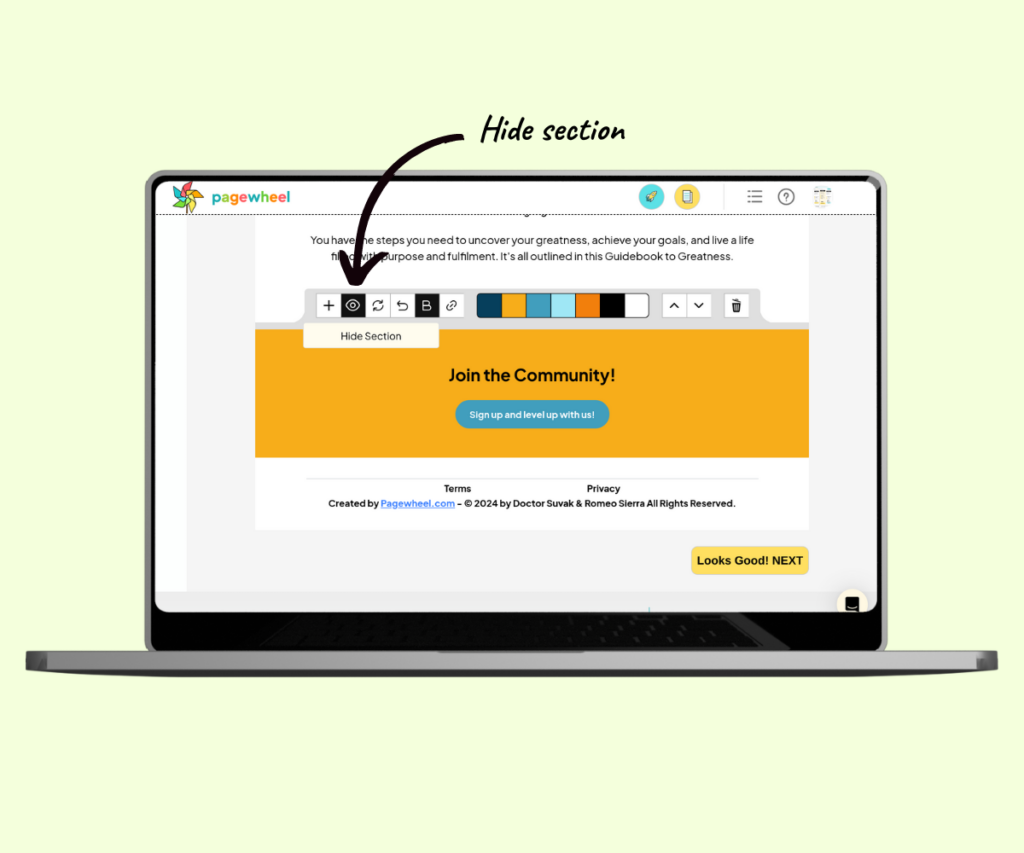
In the section editor toolbar, look for the eye icon.
When you hover over it, you’ll see “Hide Section.”
Click the eye icon to hide the section.
Once hidden, the section will appear dimmed, and the eye icon will show a line through it.
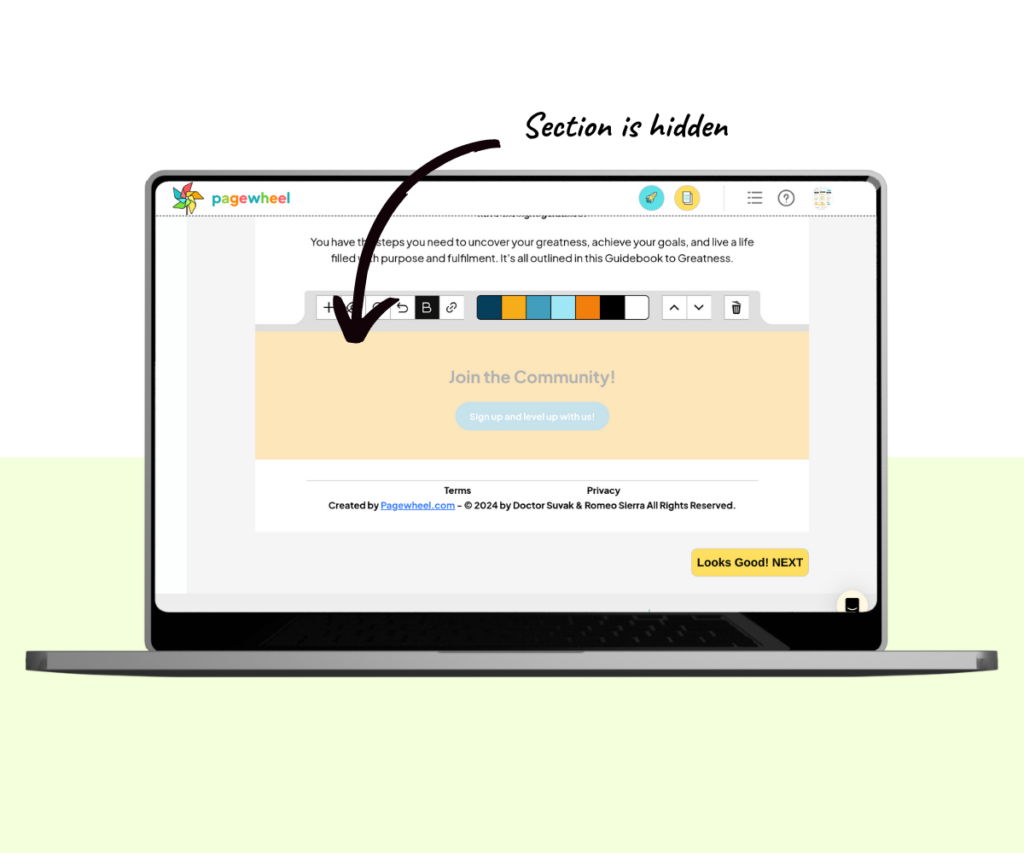
The section will now be completely invisible to your customers.
To unhide it, simply click the eye-with-line icon.
For more information, see Hiding a Section on Your Website Without Deleting It.
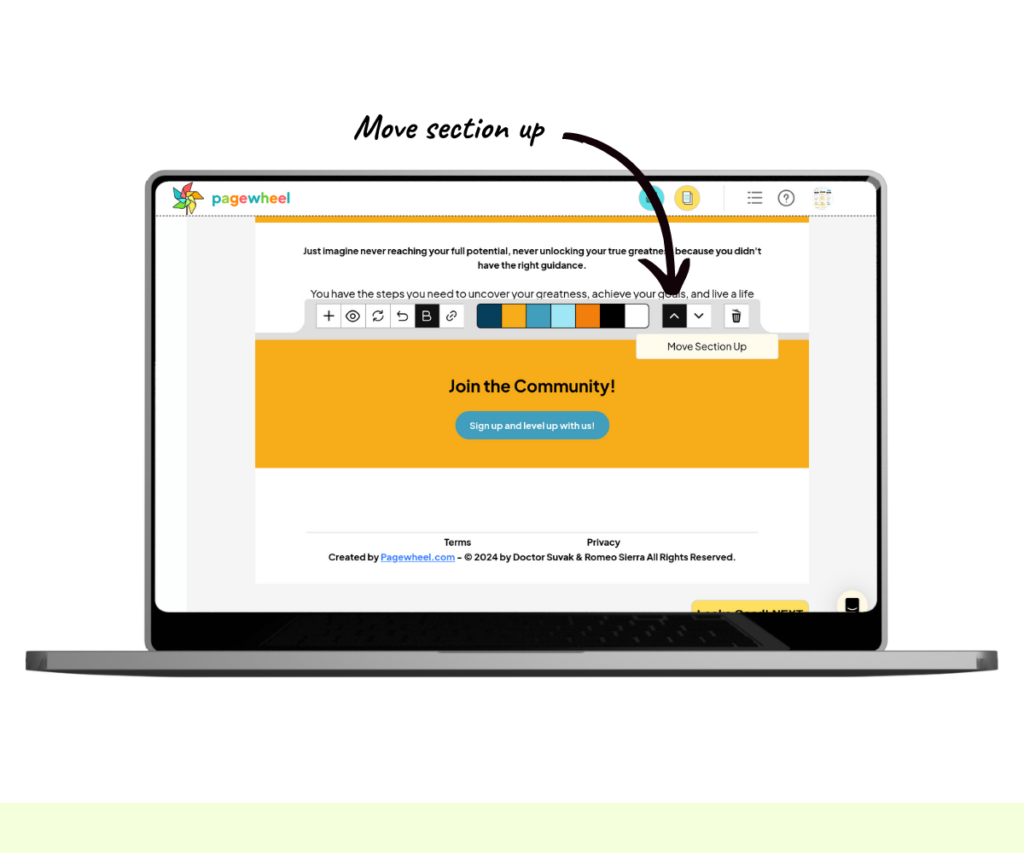
Moving the Section
If you want the community section to be more prominent on the Delivery Page, you can move it higher up.
To do this, use the up arrow on the right side of the section editor toolbar.
Keep clicking the arrow to move the section further up the page.
For more information, see Moving Sections on your Offer and Delivery Pages.
Deleting the Section
Although it’s not recommended, you can completely remove the section if needed.
To delete it, click the trash-can icon on the far left of the section editor toolbar.
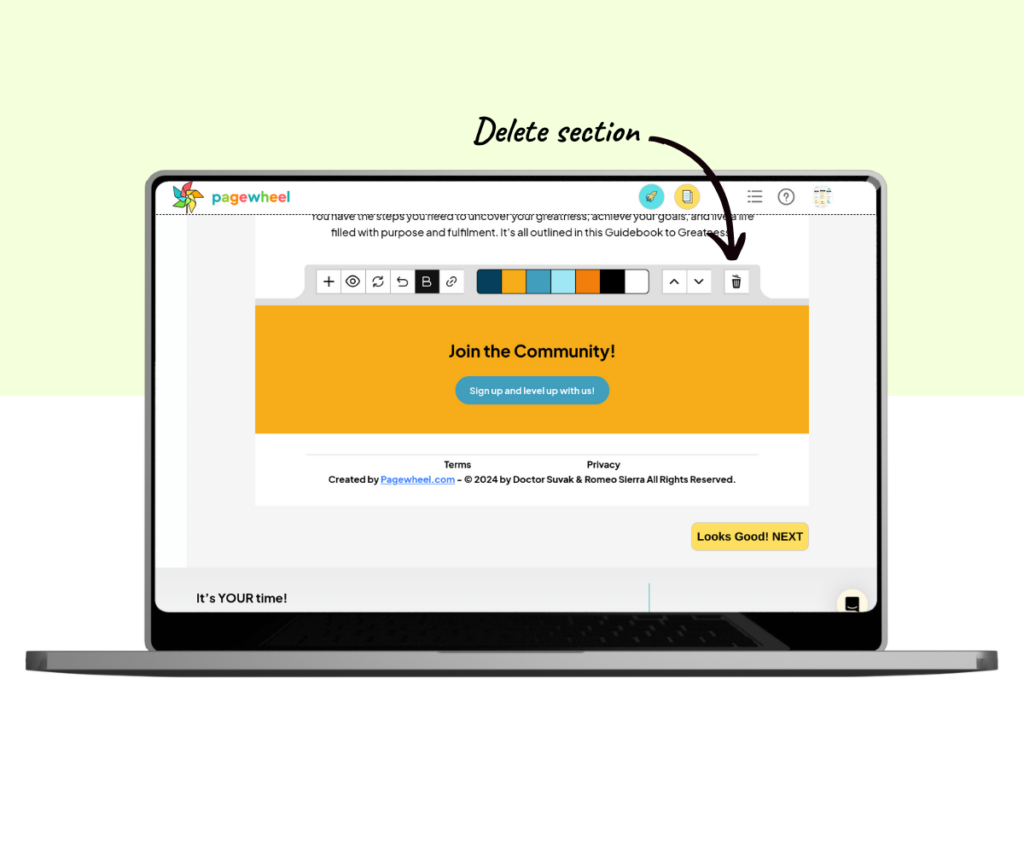
A confirmation box will appear before the section is removed.
Keep in mind, this action is irreversible. It might be better to hide the section.
For more information, see Deleting Sections from Your Website Pages.
Publishing Your Updates
Your updates won’t appear on the Delivery Page until you publish them.
Continue through the product builder until you reach the final step. Then, click the publish button to make your changes live.
For more details, see Saving vs Publishing.